(708) 775-3648

Post-Installation Cleaning: How to Ensure Your Floors Look Perfect from Day One
Matt Pehr
August 26, 2025
Request An Estimate
How to Ensure Your Floors Look Perfect from Day One
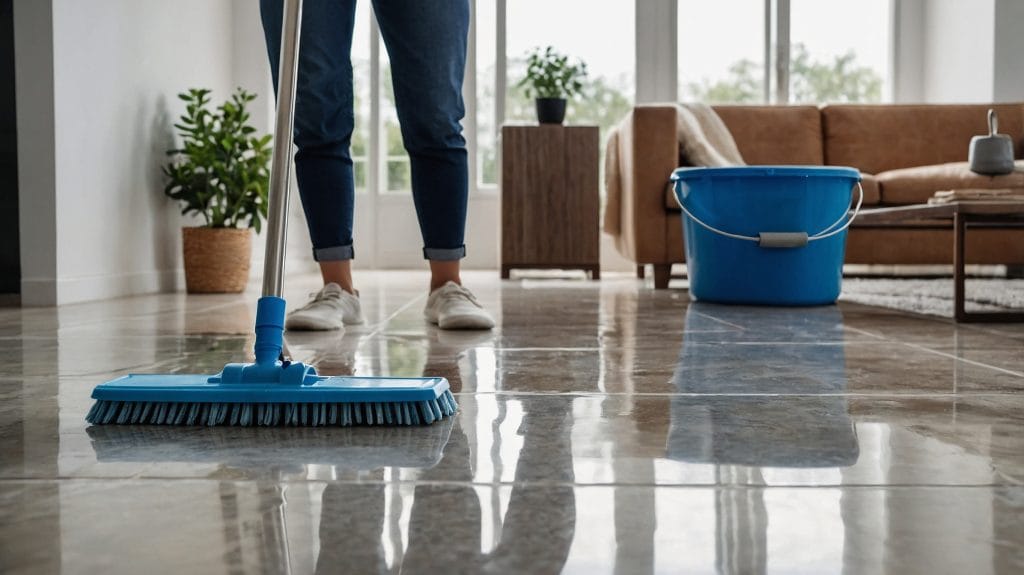
After installing new floors, proper cleaning is important to maintain their appearance and longevity.
At The Floor 4U, we understand the importance of proper post-installation cleaning and maintenance.
This comprehensive guide covers the necessary steps for post-installation.
Why You Should Do Post-Installation Cleaning
Post-installation cleaning is a critical step that’s often overlooked. Many The Floor 4U customers are eager to enjoy their new floors immediately.
But, cleaning properly can significantly impact the flooring’s longevity and appearance.
This is especially important if you’ve just moved into a new house with newly laid tiles. Knowing how to clean your new floors properly is crucial, especially when you’ve just had tile installed.
When new floors are installed, dust, debris, and residue are inevitably left behind. Check your inbox for tips on effective floor cleaning techniques.
- Construction dust
- Adhesive residue
- Grout haze after installation (for tile floors)
- Sawdust (for hardwood floors)
- Packaging materials
Leaving these materials on your new floors can lead to scratches, stains, and other damage. Moreover, proper cleaning helps to ensure that any sealants or finishes applied during installation are set correctly, providing maximum protection for your new floors.
At The Floor 4U, we always emphasize the importance of post-installation cleaning to our clients. It’s like the final step in achieving the beautiful new floors you’ve invested in.

Hiring a professional cleaning service
For new home buyers or homeowners upgrading their flooring, it’s essential to ensure proper post-installation cleaning to protect your investment. Hiring a professional cleaning service like Fay’s Cleaning Services can make all the difference. With their expert knowledge and specialized tools, they can remove construction dust, grout haze, and residue effectively, leaving your floors looking flawless. Professional cleaning ensures that your new flooring stays in top condition, enhancing its durability and appearance for years to come.
Cleaning New Tiles After Installation
Tile and grout floors are popular for many homeowners due to their durability and easy maintenance. However, they require special care immediately after installation. Here’s how to clean tile floors effectively and make them look like new:
Immediate Post-Installation Cleaning
- Allow proper drying time: Before starting any floor cleaning, ensure that the adhesive and grout have had enough time to dry completely. This typically takes 24-48 hours, but always follow the manufacturer’s recommendations. Wait until the grout is no longer still wet.
- Remove loose debris: Use a soft-bristled broom or a vacuum to remove loose dirt, dust, and debris from the tile surface to remove any particles that could scratch the surface. This is the best way to clean high-traffic areas initially.
- Damp mopping: Use a clean, damp mop with warm water to remove any remaining dust. Change the water frequently to avoid spreading dirt around. You may need to remove the dirty water several times during this process to keep the floors looking clean. A dry mop can also be effective for daily maintenance.
- Tackle grout haze: If your tiles have a cloudy film (grout haze), use a specialized grout haze remover. Follow the product instructions carefully, as these can be quite strong. You may not notice the haze immediately, but it’s important to address it. For stubborn areas, a scrub brush might be necessary.
- Final rinse: After cleaning, rinse the floor thoroughly with clean water to remove any cleaning solution residue. You might need a wet vacuum to remove excess water and ensure the floor dries evenly. This step is crucial for cleaning the entire floor effectively.
What Not To Use
When cleaning your newly installed tiles, avoid using harsh cleaning products that can damage the surface.
- Acidic cleaners (like vinegar) on natural stone tiles (though you can use vinegar to clean hardwood floors and some types of tile)
- Abrasive cleaning tools that can scrub the floor and scratch the tile surface
- Oil-based cleaners that can leave a residue
- Bleach or ammonia-based cleaners that can discolor grout

Basic Tile Maintenance
To keep your tiles looking their best after the initial cleaning:
- Sweep or vacuum the floor regularly to remove dirt and prevent accumulation.
- Use a pH-neutral floor cleaner specifically designed for your type of tile.
- Clean spills immediately to prevent staining.
- Periodically deep clean, maintain, and reseal grout lines to maintain their appearance and integrity. Grout cleaning is an essential part of tile maintenance.
Cause of Tile Haze
Tile haze, or grout haze, is a common issue after tile installation. It’s like a thin, cloudy film of grout residue left on the surface of the tiles after grouting. This haze can make it look dull and dirty, even though they’re brand new.
The main causes of tile haze include:
- Improper cleaning during installation: If excess grout isn’t removed properly during the installation process, it can make the ceramic tile floors look dirty.
- Using too much water during cleanup: Excessive water during the initial cleaning can spread grout residue across the ceramic tile floors instead of removing it.
- Not following manufacturer’s instructions: Different types of grout and tiles may require specific cleaning methods, which can result in haze.
- Rushing the cleaning process: Cleaning too soon after grouting or not allowing enough drying time between steps can lead to haze formation.
Clean the Tiles: Removing Tile Haze
If you’re dealing with tile haze, here’s how to tackle it:
Try dry methods first: Buff the floor tile with a dry, clean microfiber cloth for light haze. This can sometimes be enough to remove the residue. The dry cheesecloth method can be particularly effective for light haze.
- Use a commercial grout haze remover: These products are specifically designed to dissolve and remove grout haze from porcelain tiles after installation. Always follow the manufacturer’s instructions carefully.
- Make a DIY solution: For ceramic tile or porcelain tiles, you can try a mixture of warm water and a few drops of dish soap. For porous tiles, use a pH-neutral cleaner to avoid damage. You can also mix four parts water with one part white vinegar for a gentle cleaning solution, but avoid this on natural stone.
- Apply the solution: Use a clean sponge or mop to apply the cleaning solution to the fresh and new tiles. Work in small sections and rinse thoroughly with clean water. For stubborn haze, you might need to use a cleaning pad to scrub with a little elbow grease.
- Buff dry: Use a clean cloth to buff the tiles and bring out their shine.
Remember, at The Floor 4U, we always recommend testing any tile cleaning solution on a small, inconspicuous area first to ensure it won’t damage your tiles.
For epoxy grout or particularly stubborn haze, consult a professional tile cleaner or your installer for proper care for new tiles.
Cleaning Flush Vents
Flush vents are an important part of many flooring installations. At The Floor 4U, we recommend the following steps for cleaning flush vents after installation to keep your floors looking their best. cleaning flush vents after installation:
- Remove the vent cover: Carefully lift the vent cover from its housing to ensure all surfaces of the floors look clean.
- Vacuum: Use a vacuum with a brush attachment to remove any debris from both the vent cover and the duct opening.
- Wipe down: Use a damp microfiber cloth to wipe down the vent cover and the visible parts of the duct. For stubborn dirt, use a mild soap solution or a steam mop for better results.
- Dry thoroughly: Ensure all components are completely dry before replacing the vent cover.
- Reinstall: Carefully place the vent cover back into its housing, ensuring it sits flush with the surrounding flooring.
Post-Installation Carpet Care
For those who’ve chosen carpeting from The Floor 4U, follow these steps for post-installation care:
- Vacuum thoroughly: Use a high-quality vacuum cleaner to remove loose fibers or debris. Go over each area multiple times in different directions.
- Address shedding: New carpets often shed loose fibers. Regular vacuuming in the first few weeks will help manage this.
- Remove adhesive residue: If you notice any adhesive on the carpet surface, use a carpet-safe adhesive remover, following the product instructions carefully.
- Steam clean: A few weeks after installation, consider a professional steam cleaning to deep clean and help the carpet fibers settle.
- Manage traffic: Use area rugs in high-traffic zones for the first few weeks to allow the carpet to settle evenly.
Luxury Vinyl Flooring Care
Luxury vinyl flooring from The Floor 4U is known for its durability and ease of maintenance. Here’s how to care for it post-installation:
- Wait before wet cleaning: Allow at least 48 hours after installation before wet mopping to ensure adhesives have fully set.
- Remove debris: Use a soft broom or vacuum with a soft brush attachment to remove any loose dirt or debris.
- Damp mop: Use a wet mop with a pH-neutral cleaner designed for vinyl flooring. Avoid excessive water, which can seep into seams and damage the subfloor.
- Address spills promptly: Clean up any spills immediately to prevent staining or damage to the vinyl.
- Avoid harsh chemicals: Don’t use abrasive cleaners, wax-based products, or bleach on your luxury vinyl flooring.
While these steps are manageable for many homeowners, some may prefer to save time and ensure professional results. If you’re looking for expert care for your new luxury vinyl floors, consider Fay’s cleaning services.
Their team is equipped to handle post-installation cleaning, regular maintenance, and even move-in or move-out cleaning for homes with luxury vinyl flooring.
By using professional services, you can be confident that your new floors are being cleaned effectively and safely, preserving their beauty and extending their lifespan.
How to Clean Other Areas of the House After Builders
While focusing on your new floors is important, remember other areas of your home that might have been affected by the installation process. Here are some tips:
- Dust all surfaces: This will help prevent any buildup that can make your floors look dirty. Use a microfiber cloth to wipe down all surfaces, including windowsills, countertops, and furniture.
- Vacuum thoroughly: Vacuum corners, baseboards, and other areas where dust accumulates to remove the dirty residue that is often left behind.
- Clean windows and mirrors: Use a glass cleaner to remove any smudges or fingerprints.
- Wash fabrics: Curtains, throw pillows, and other fabrics may have collected dust during installation. Wash or clean them according to their care instructions.
- Change HVAC filters: Construction work can clog your air filters more quickly than usual. Consider changing them after the installation is complete.
Frequently asked questions
Reviewed by Matt Pehr, owner of The Floor 4U.
How do you clean tile floors after installation?
Wait until the grout has fully cured, about 48 to 72 hours, then sweep or vacuum loose debris and damp-mop with plain warm water or a pH-neutral tile cleaner. This works whether you call it cleaning freshly laid tile, tile after construction, or tile after laying, and it lifts installation dust without dulling the finish.
How long do tiles take to dry after mopping?
Tile is usually dry enough to walk on within 15 to 30 minutes of a light damp-mop, once standing water is gone and the surface looks matte instead of wet. Grout takes much longer to fully cure, typically 48 to 72 hours after installation, so avoid heavy mopping or standing water on new grout until then.
What should you not clean tile floors with?
Avoid harsh acids like vinegar or lemon and abrasive powders, which etch stone and erode grout, plus oil-based or wax cleaners such as Murphy Oil Soap that leave a dulling, slippery film. Skip steam mops on newly installed tile too, since heat and moisture can stress grout that has not fully cured yet.
Is Dawn dish soap good for cleaning tile floors?
Dawn works for occasional light cleaning on sealed ceramic or porcelain tile, but not for regular use. Even a few drops in warm water can leave a dull, sticky residue that builds up in grout lines and shows streaks over time. A pH-neutral tile cleaner rinses cleaner and is the better everyday choice.
How do you remove grout haze after tile installation?
Grout haze, the cloudy film left as grout dries, usually wipes off with a damp microfiber cloth or sponge and warm water within the first few days. For stubborn haze, use a dedicated grout-haze remover or a cheesecloth buff, following the grout maker’s cure-time guidance, and avoid vinegar or acids on natural stone.
By following these guidelines, you can ensure that your newly installed floors, whether tile, carpet maintenance, luxury vinyl, or flush vents, look perfect from day one and maintain their beauty for years.
If you have any questions about post-installation cleaning or floor maintenance, don’t hesitate to contact the experts at The Floor 4U.
Share
Recent Posts

October 8, 2026
Can You Install Flooring Over Existing Tile? (Video)
Matt Pehr explains when flooring can go over existing tile and why flatness, lippage, appliance clearance, and door swing need a closer look....

October 6, 2026
Engineered vs Solid Hardwood: Which Lasts Longer?
Engineered vs solid hardwood, compared by a Mokena installer: wear layer, refinishing, lifespan, basements, radiant heat, plank width, and cost....
October 6, 2026
Subfloor Repair and Floor Leveling in Mokena, IL
What subfloor repair and floor leveling involve before new flooring goes down in Mokena, IL, what published guides say it costs, and how...
Pingback: Simple Steps to Install Stone Look Vinyl Tile in Bathrooms
Pingback: What to Know Before Installing Vinyl Flooring in Your Kitchen